Hey there, fashionistas! If you're diving into the world of fashion blogging, you probably know that visual content is everything. It’s not just about showing off your outfits or the latest trends; it’s all about creating eye-catching images that grab attention and engage your readers. The truth is, high-quality photos can really make or break your blog. To stand out in this crowded space, you need to make sure your content looks gorgeous and professional. In this article, we’re going to share some easy secrets to help you create perfect photos for your fashion blog, from using a handy face editor to common mistakes to steer clear of. Now let’s get started!
Contents
1. Perfecting Photos in Post-Production
Post-production is key to making your fashion photos stand out. It helps fix small issues and adds a polished, professional feel—even if the photo was taken on a phone. You can start with simple edits like brightness, contrast, and saturation. Next, fix some common issues, such as the red-eye effect. It usually pops up when you snap photos in low light, and the flash reflects off your eyes. Luckily, there’s a quick fix: using a red eyes photo editor. This handy tool lets you zap away the red eyes in no time.
Some photo editors also let you fix or apply makeup in post-production. This is a great feature you should definitely make use of. You can also adjust the skin tone and slightly retouch facial features if needed.
Another helpful trick is cropping and straightening your photo. Cropping helps you remove distractions at the edges of the frame, like a trash can or someone walking by. Straightening keeps your background lines (like walls or streets) level, which makes the whole image look more professional—even if you took it on your phone. You can also use filters, but try to keep it consistent across your photos to maintain a clean, stylish feed. For example, if you always use a slightly warm-toned filter, your Instagram grid will look more put-together.
2. Lighting Tips
One of the biggest blunders is poor lighting. Seriously, lighting is everything! Natural light is your best friend, so try to snap those pics during the golden hour—either shortly after sunrise or before sunset. To achieve a natural glow, take photos around 8–9 AM or 5–6 PM. If you’re shooting indoors, go for soft artificial lighting to avoid those harsh shadows that can ruin a shot.
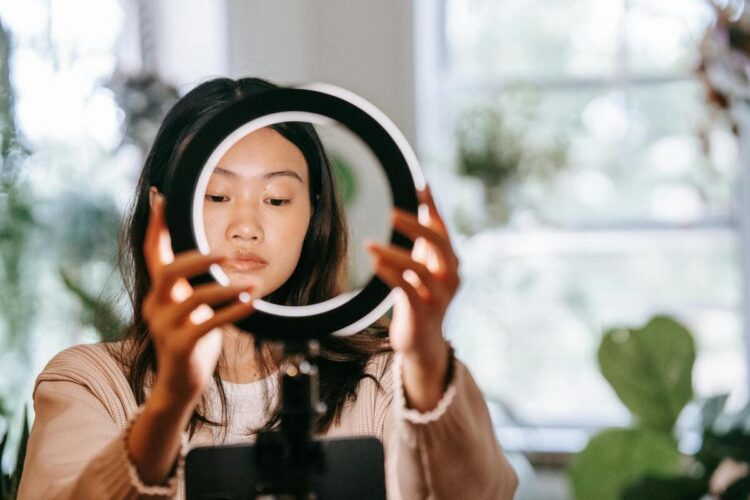
If you mainly take your pictures at home, you should also try using a ring light. It produces soft and direct light. But you need some time to get the hang of it to position the ring light correctly. For example, you can place it slightly above eye level and angle it downwards. This way, you’ll avoid reflections in the photos. Just experiment to see what works best for you.
Now let’s see some other common recommendations:
1. Avoid harsh midday sun—it might result in strong shadows on your face and outfit. If you must shoot at noon, you can find shade under a tree or beside a tall building.
2. Use a white wall or reflector to bounce light. This trick helps you brighten your face and outfit evenly.
3. Don’t cancel your shoot just because it’s overcast—your photos might actually turn out better! Clouds work like a natural filter and can give soft, even lighting.
3. Props and Equipment
Props can also add flair to your shots, but remember to use them wisely. They should enhance your photos, not distract from them. Make sure your outfit fits the vibe of your photoshoot, too. If you’re in a lush garden, a flowy dress might be just the ticket. In an urban setting, chic streetwear could be the way to go. Each photo should tell a story, so think about what you want to express and let that guide your images.

While scrolling your feed, you might also wonder how these bloggers take photos of themselves. Their secret weapon is a Bluetooth remote shutter. It’s a real lifesaver for any kind of shooting, be it outdoors or in a studio. It’s also essential to use some additional equipment when taking photos. For instance, a tripod can help you keep your phone or camera steady—this helps you shoot clear pictures.
4. Preparing the Background
When picking a background for your fashion photos, try to find locations that work with your outfit, not against it. For example, if you’re wearing a sleek black dress, a minimalist white wall or a neutral-toned building can help the outfit pop. If you're rocking a floral dress, look for a park or garden with greenery that complements the colors in your outfit.
It’s better to avoid busy street scenes or areas with too many distractions (like random people or cars) because they'll pull attention away from you. A cool trick is to use doors or windows as natural frames—they can create depth and draw focus right to your outfit. For street style shots, urban backdrops like brick walls, murals, or even colorful storefronts can add personality to the shot, but make sure the colors don’t clash with what you're wearing.
5. Composition and Angles
Let’s not forget about composition. The way you frame your shot matters a lot! Following the rule of thirds can help you create a balanced and eye-catching composition. Picture dividing your image into a grid of nine equal parts and placing your subject along those lines or at their intersections to make your photos more dynamic.
To nail perfect shots, there are a few fun tricks you can try. First off, don’t be afraid to play around with angles. Different perspectives can lead to some seriously cool photos. A little change in angle can make a huge difference!
Key Takeaways
In conclusion, stunning photos draw readers in, keep them interested, and encourage them to share your content everywhere. Whether you're posting on Instagram, Pinterest, or right on your blog, having those eye-catching visuals is super important.
Creating perfect photos for your fashion blog doesn’t have to be stressful. It’s all about planning, paying attention to details, and being open to learning from your mistakes. By focusing on high-quality visuals and using additional tools, you can take your content to the next level. Remember to keep practicing, experiment with different techniques, and, most importantly, have fun with your photography journey! By following these tips and avoiding common pitfalls, you’ll be well on your way to snapping stunning images that truly resonate with your audience.
Leave a Reply